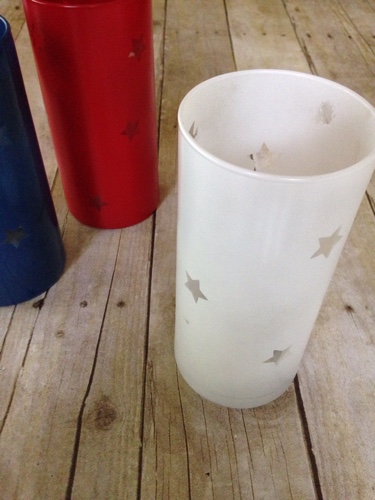
• Skip to primary navigation
  • Skip to content
  • Skip to primary sidebar
  • Home
  • Start Here
  • Cleaning & Organizing
    • Homemade Cleaners
    • Kitchen
    • Bath
    • Organizing
    • Cleaning Hacks
  • Household Tips
    • Simple Tips
    • Fun With Kids
  • Smart Money
    • Living On Less
    • Budgeting
  • Recipes
    • Freezer Cooking
    • Slow Cooker
    • All Recipes
  • Store
  • Contact Me

Frugally Blonde

Making the Frugal Life Fabulous

Privacy Policy

Dollar Store Patriotic Lanterns

This post may contain affiliate links. Please see my full disclosure policy for details.

June 19 by Julie

Dollar Store Lanters

I don’t know what it is about the 4th of July, but it always puts me in a crafty mood. I was wanting to make something for the 4th and these dollar store patriotic lanterns were both easy and thrifty. This is a perfect project to let the kids help out with too.

red-white-and-blue-patriotic-lanterns.jpg

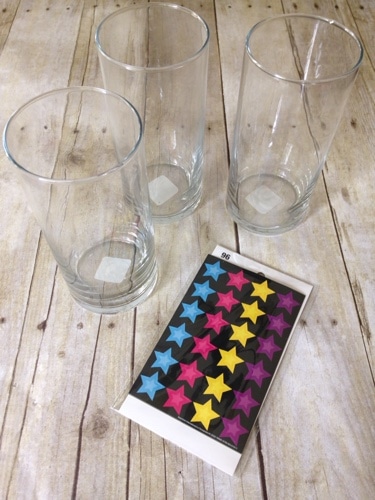
I started with 3 candle holders and a pack of stickers. They were only one dollar each at the dollar store. I love the dollar store!

red-white-and-blue-patriotic-lanterns.jpg

The kids or you can place the star stickers all around the candle holders. I didn’t use a particular pattern, I just stuck them on.

red-white-and-blue-patriotic-lanterns.jpg

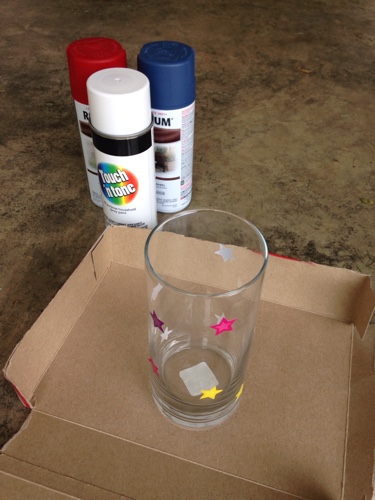
Once you have on all the star stickers, grab your spray paint and get started. It was a windy day here, so I spray painted in my garage. Make sure you lay down something first so you don’t get paint everywhere. I cut open an old cereal box we were throwing away.

red-white-and-blue-patriotic-lanterns.jpg

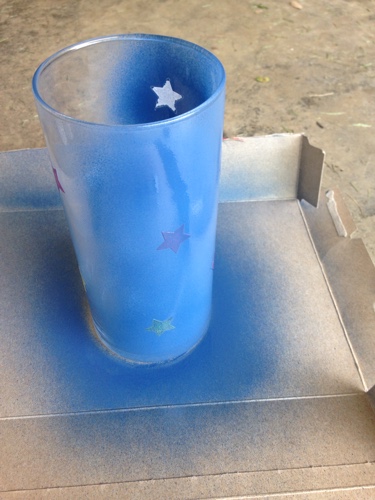
Start painting the candle holders. I recommend keeping about 10-12 inches away so the paint doesn’t get too drippy. I just sprayed in one coat, but you may want to use two small coats.

red-white-and-blue-patriotic-lanterns.jpg


Spray until the stickers aren’t very visible. You can see where they are, but not the color.  Let them sit until the paint is dry. This should take three to four hours depending on the temperature.

dollar-store-lanterns.jpg

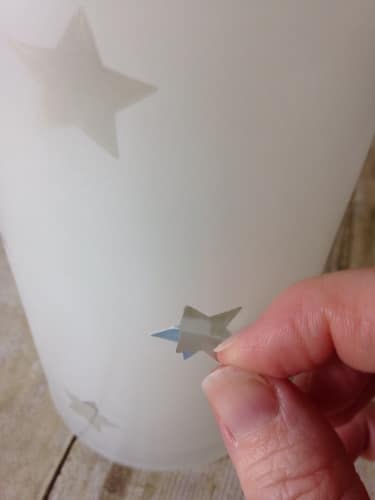
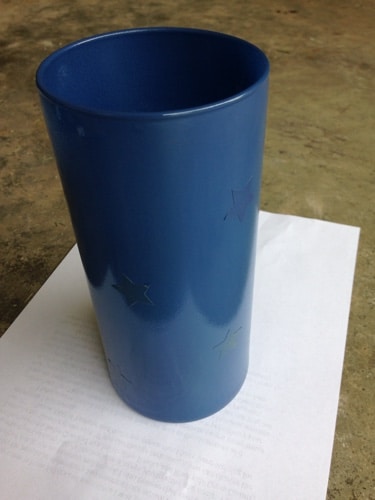
Now you can peel off the stickers. Put some candles in them and you are ready for the 4th. I used citronella candles to help keep the bugs away.

dollar-store-lanterns.jpg

This project was so easy, even I could handle it (and I am so not crafty)! So what are you waiting for? Grab some spray paint and get started on these awesome dollar store patriotic lanterns.

For more DIY ideas and homemaking tips delivered to your inbox you can subscribe here.


P.S. For more cleaning tricks and frugal tips delivered to your inbox subscribe here!
Pin7.5K
Share34
Tweet
+1
Yum
7.5K Shares

Reader Interactions

Comments

  1. Jacky @ JoyfulSavings says

    June 20 at 7:46 pm

    I love dollar stores, especially Dollar Tree… I love what you did with the cups, and it is a beautiful look that can be used for any ocassion, by just changing the spray color and the shape of the stickers… great job!

    Best!

    • Julie says

      June 20 at 7:53 pm

      Thanks! The dollar tree is great, isn’t it?

  2. Joann Woolley says

    June 21 at 1:51 am

    Such a brilliant and simple way to decorate for the 4th of July! Definitely pinning this one. Love that I can take this idea and switch it up for other holidays too.

  3. Ashley H says

    June 21 at 7:08 am

    So cute! I’m sharing this post with my FB fans! Stopping by from Share the Wealth Sunday.

    The Frugal Ginger

    • Julie says

      June 21 at 2:58 pm

      Thanks for sharing and stopping by!

  4. Misty Nicole Roberts says

    June 22 at 10:59 am

    Oh my gosh, I needed this post! I could see these lining a walkway for summer parties! By the way, my name is Niki, and I’m one of your fellow Merry Monday hosts, and wanted to let you know that I love your blog and hope to catch up on several of your other projects this week, too! Pinned! Have an awesome week!

    • Julie says

      June 22 at 11:02 am

      Thanks for stopping by! Have a great week!

  5. Nina Lewis says

    June 22 at 11:33 am

    I love this idea! I tried making one with just circle dots (not for a holiday) and had a hard time getting the circles off afterwards. Drat!

    I have a link party that I am trying to grow. I invite you to share this idea (and a couple of others) at my Grandma Ideas Sharing Time link up at http://grandmaideas.com. I think my readers would LOVE this idea.

    My linkup is open Wednesday through Friday at midnight. I hope to see you there!

    All the best,
    Nina

    • Julie says

      June 22 at 2:33 pm

      Thanks for stopping by! I will make sure I link up, thanks for the invite.

  6. Liz Joiner says

    June 22 at 2:51 pm

    Visiting from Modest Monday

    What a great and simple project! I may do this for 4th of July just so we can be a bit more festive.

    liz @ sundays with sophie

  7. Hannah @ Eat, drink and save money says

    June 22 at 8:13 pm

    You gotta love the dollar store! This is a great project for all sorts of holidays. I can’t wait to give it a try.

    Thanks for linking up with Share the Wealth Sunday!

  8. Deborah says

    June 23 at 10:01 am

    These are lovely! I have them on my to-do list now if I get to the dollar store before the 4th. Pinning 🙂 .
    Blessings,

    • Julie says

      June 23 at 10:11 am

      Thanks for pinning!

  9. Tianna says

    June 23 at 11:59 am

    such a cute idea for the 4th!

    • Julie says

      June 23 at 1:36 pm

      Thanks!

  10. Erlene says

    June 23 at 5:31 pm

    I love the dollar store too! These are a great inexpensive way to decorate for July 4th. Thanks for sharing on Merry Monday.

  11. Melanie Redd says

    June 24 at 9:27 am

    Very cute idea. It doesn’t look too hard, even for a non-crafty person like me!

    I found you on the Raising Homemakers Link up, and I’m glad to find your site. I also followed you on Pinterest.

    Hope you have a wonderful day today~
    Blessings,
    Melanie

    • Julie says

      June 24 at 12:20 pm

      Thanks for stopping by!

  12. Amy Kelsch says

    June 26 at 11:29 am

    These are darling! So creative and budget-friendly! Thanks!

  13. Amanda says

    June 26 at 11:36 am

    What a neat trick! I’m also not very crafty, but I feel like I can do this. I don’t use candles, but they’re so pretty I’m sure I can find another use for them. Thanks for the tip.
    #homematterslinkyparty

  14. Betsy @ BPhotoArt.com says

    June 27 at 8:51 am

    Love this idea. Very simple, yet well put together. Wonder if we have any old vases lying around still…. hmmm.

    Thanks for sharing at #SmallVictoriesSundayLinkup …I’ve pinned your post!

    • Julie says

      June 28 at 9:13 am

      Thanks!

    • Julie says

      July 3 at 5:29 pm

      This would work great on some old vases! Hope you find some.

  15. Kristi says

    June 30 at 2:52 am

    Fun idea! I never would have thought to use the stickers. Thanks so much for sharing at #HomeMattersParty. Hope you’ll join us again.

  16. Lauren says

    July 2 at 4:51 pm

    oh my gosh.. this is such an adorable idea! Love it!

    • Julie says

      July 3 at 5:27 pm

      Thanks! It’s so easy too!

Primary Sidebar

Welcome

Photo of Julie
Welcome to Frugally Blonde! I’m Julie. I love sharing the best cleaning hacks, organizing tricks, & money saving tips. Read More….

Search

Join The Challenge

Success! Now check your email for next steps.

There was an error submitting your subscription. Please try again.

Popular Posts

How to Clean Your Dryer Vent Like a Pro
How To Clean Toilet Stains Like A Pro

How To Remove Grease From Cabinets

© 2019 FrugallyBlonde · Privacy Policy

Privacy Policy
7 Day Cleaning Challenge
Name:
Email: