


Does your porcelain sink need some repair? Check out these tips on how to fix a chip in a porcelain sink. It's easy to do and will have your sink looking like new!
When we bought our house about 10 years ago it actually came without a kitchen sink. Our house was a repo and they took a lot of stuff with them when they left, including a sink.
I picked out a shiny cream sink instead of a stainless steel one. After 10 years I still love the look of my cream sink, however, it hasn't held up as well as I had hoped.
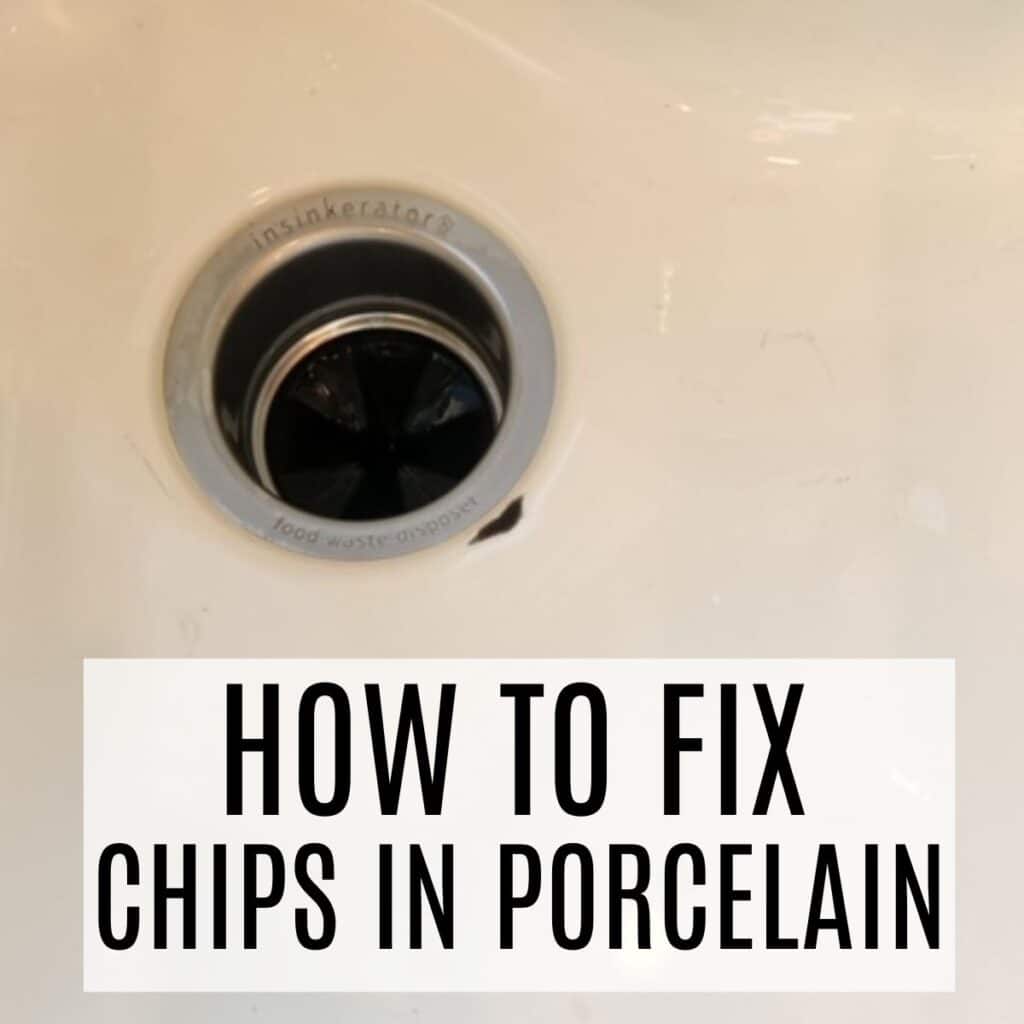
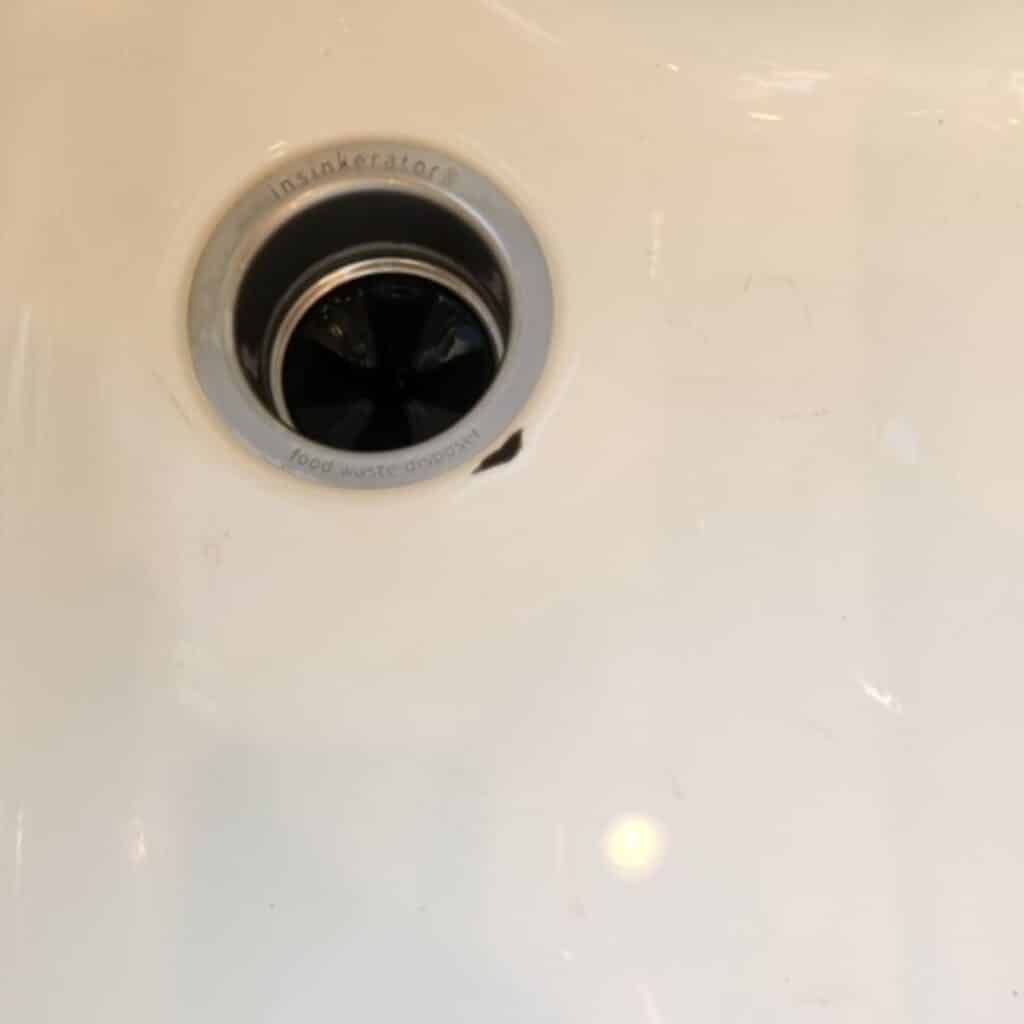
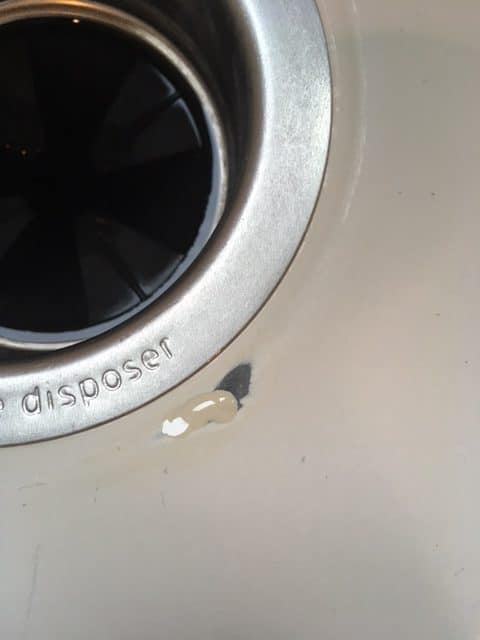
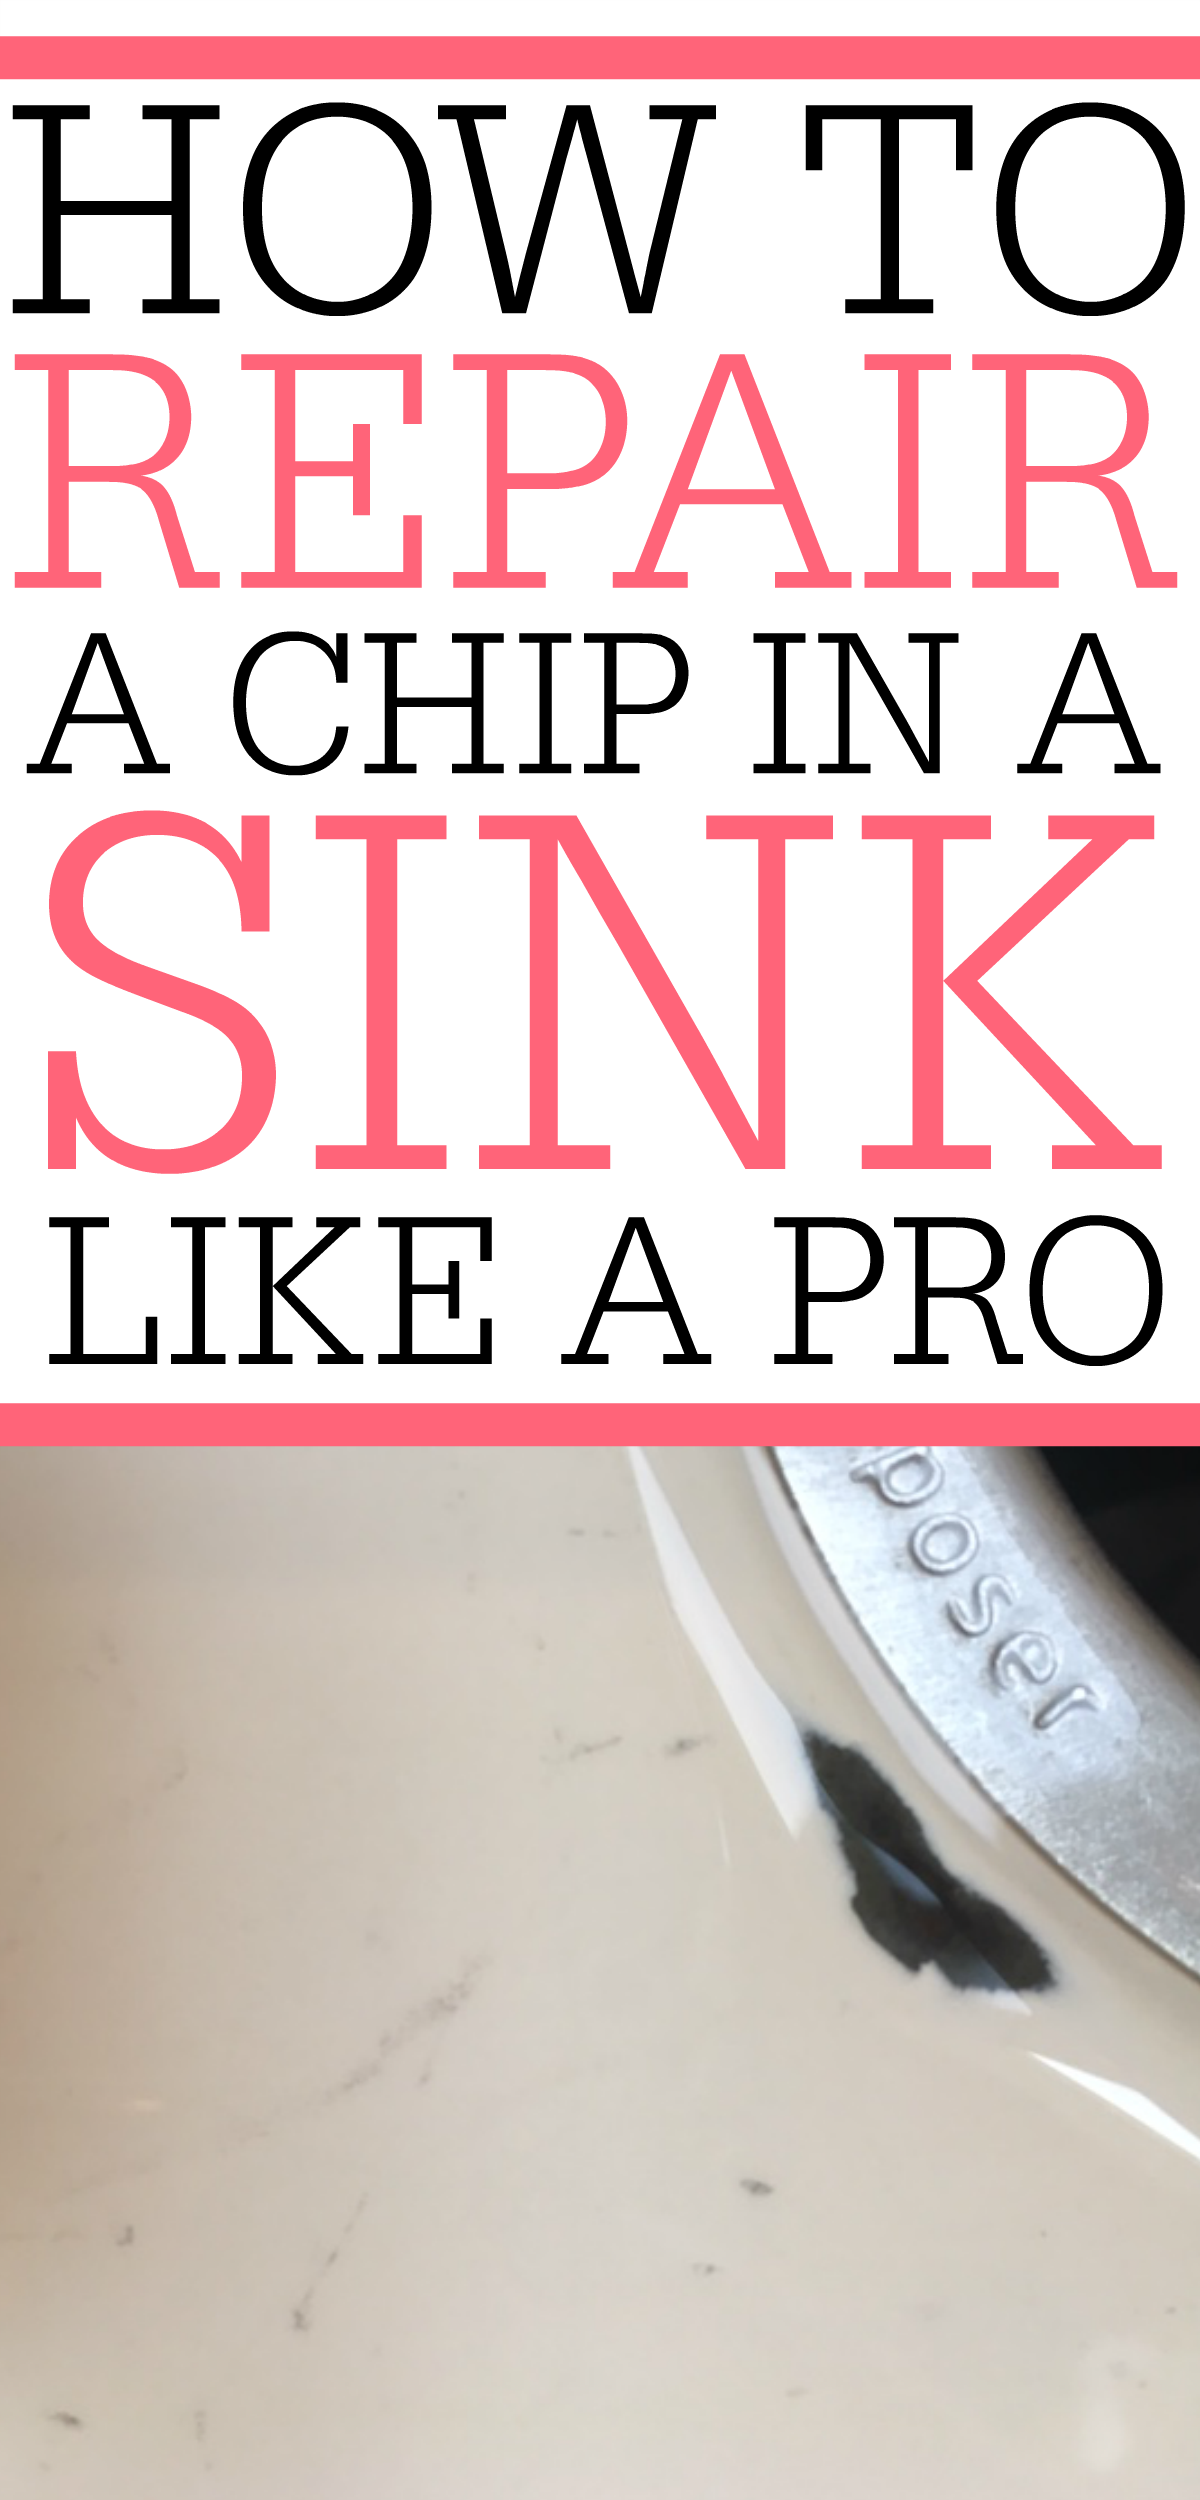
About a year ago it developed a chip near the drain. I finally got around to fixing it and it worked so well that I thought I would share how I fixed it.
If you have some chips or scratches in your sink check out how to fix a chip in a porcelain sink like a pro. It only takes about 15-20 minutes and your sink will look so much better!
How To Fix A Chip In A Porcelain Sink
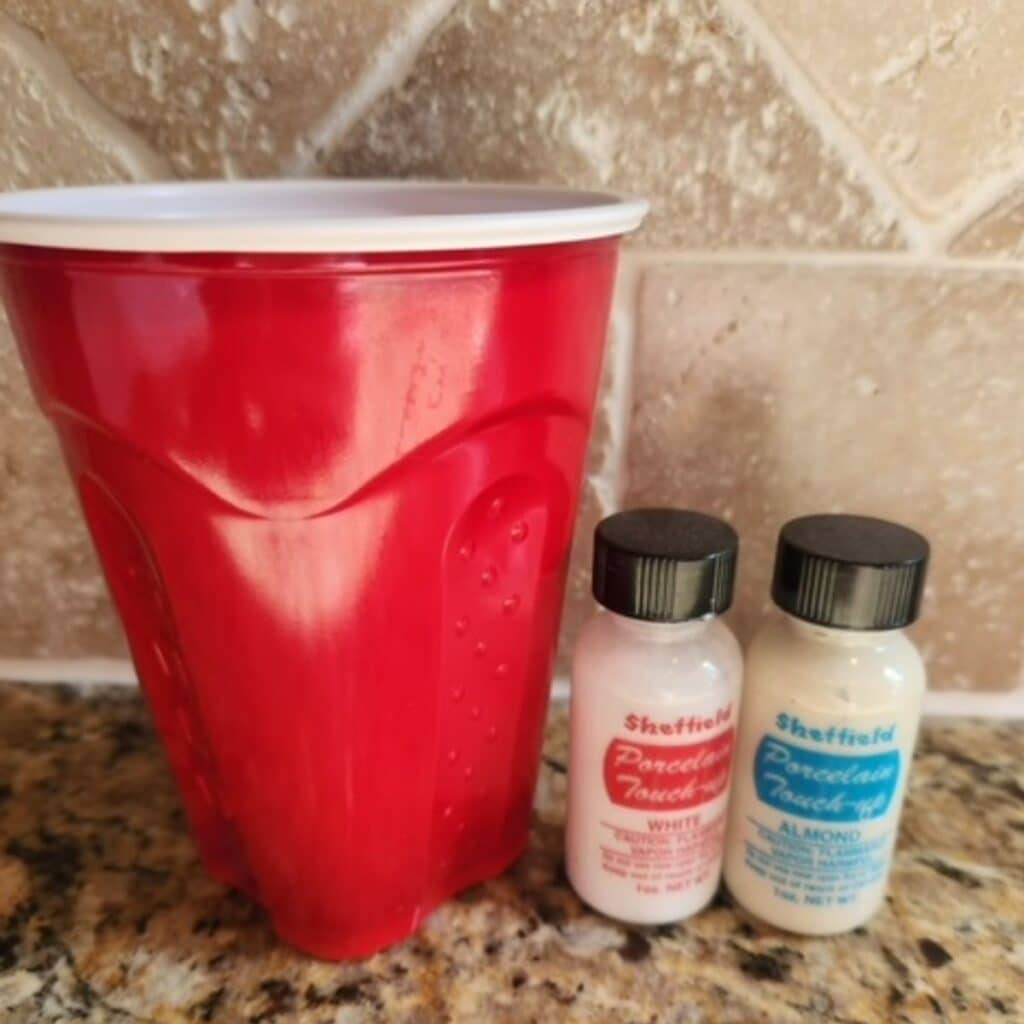
To fix your sink you will need a few things. You can either get what you need a the hardware store or from Amazon.
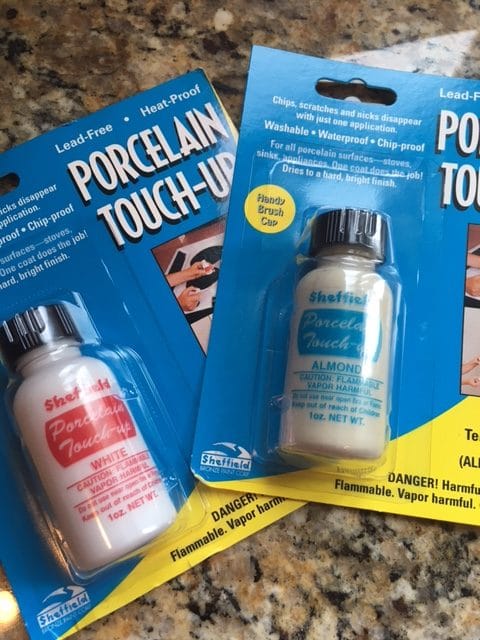
Items You Will Need:
- Porcelain Touch-Up Kit (I bought mine from Amazon)
- Sink Cleaner (I make my own homemade sink cleaner)
- Paper Towels
I bought this one and this one from Amazon because my sink is a creamy color. If you have a bright white sink you can just buy the white kit.
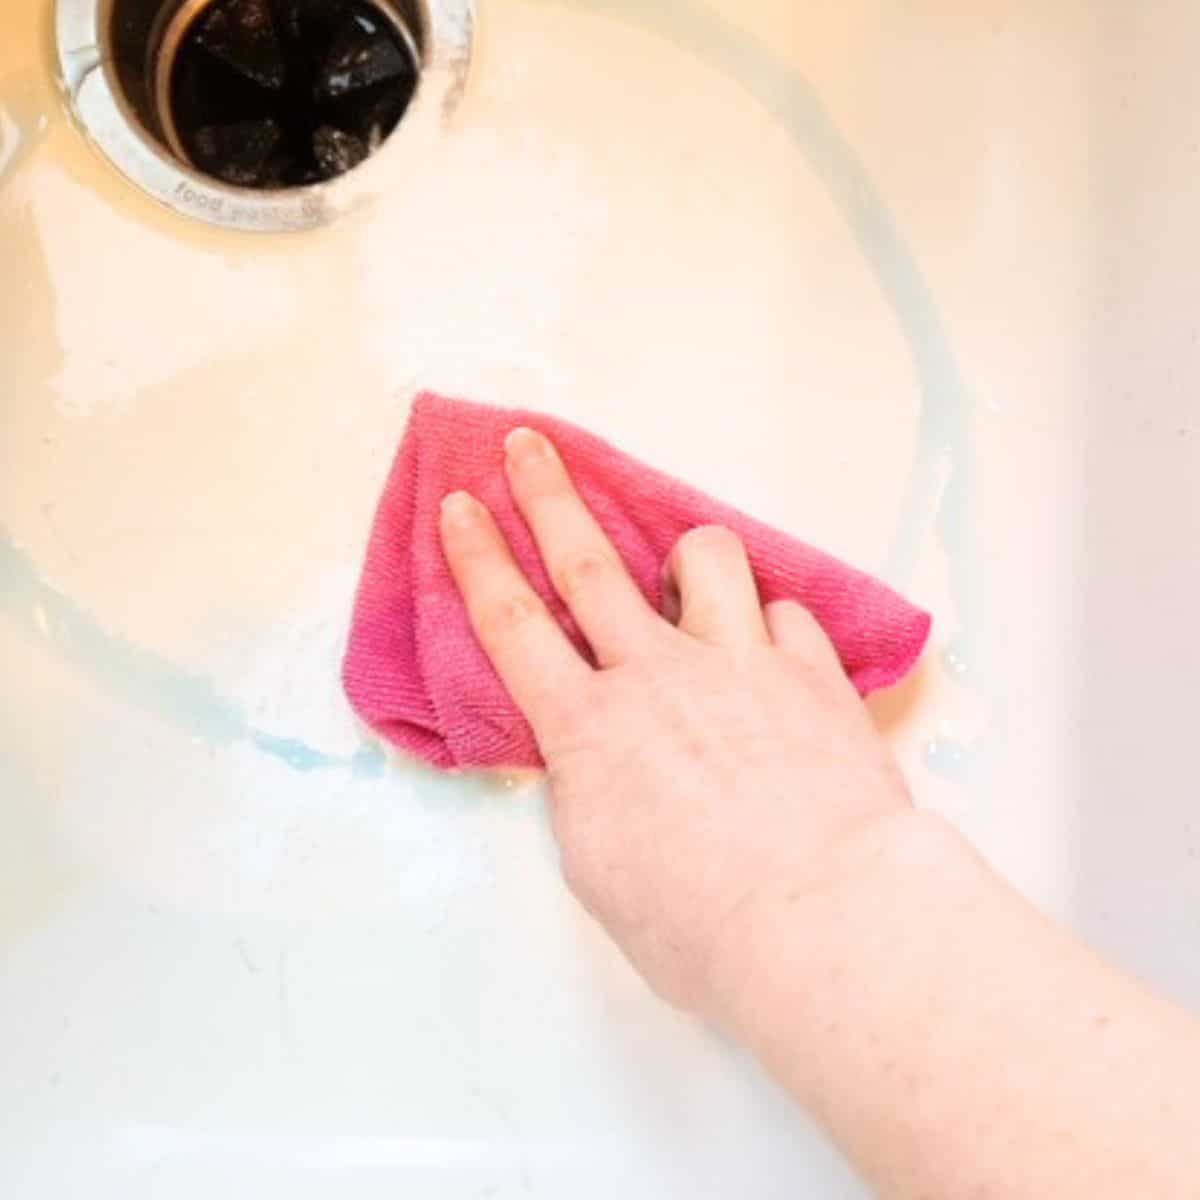
Clean The Sink
You will want to start by cleaning the sink. I used my homemade sink cleaner to get it clean.
I made sure to concentrate on the area around and where the chip was.
If you have any food or dirt in the chip area the repair kit won't work.

Free Weekly Cleaning Printable
Clean your home in under 30 minutes a day with this free Weekly Cleaning printable!
After your sink is clean then let it dry. I wiped mine down with a microfiber cloth and then let it air dry for about 45 minutes to make sure that the crack had fully dried.
Once your sink is clean and dry you are ready to start applying the sink repair kit.
If your sink is bright white you can use just the white repair kit. I had to make a "custom mix" for my sink. I wanted it to look as good as possible.
I used the plastic tray that the repair kits come in to mix both the white and the almond to get a perfect color.
This may take a few minutes. If you get it on the sink and find the color doesn't match you can wipe it off right away.
When you have your color ready to go then get a decent amount of paint on the brush and drop it over the chipped area of the sink.
Take the brush and some more paint and smooth the paint out across the chipped area. You will want to take the paint a little further than just the chipped area so it bonds to the sink.
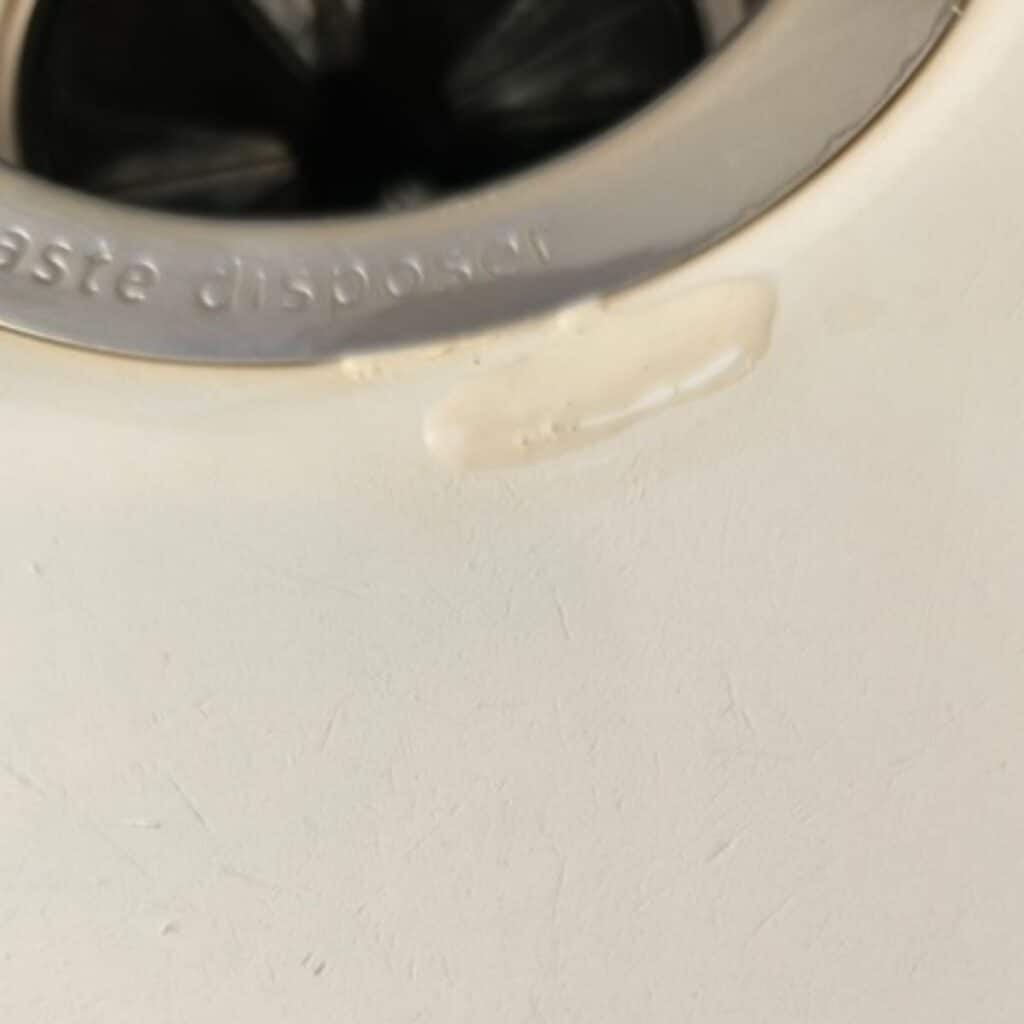
Once you feel like you have covered the area set a timer for 15 minutes and let it dry. When 15 minutes have passed then check it to make sure the chip is still well covered.
If you are happy with how it looks you can stop here. I added a little more to mine and then let it sit for another 15 minutes.
When you are done then you need to let the sink cure overnight. This is a very important step.
If you don't let it sit then the paint can't fully harden and the repair will not last.
I used some tape and a sign to cover the sink overnight. I didn't want to forget. In the morning you can use your sink again.
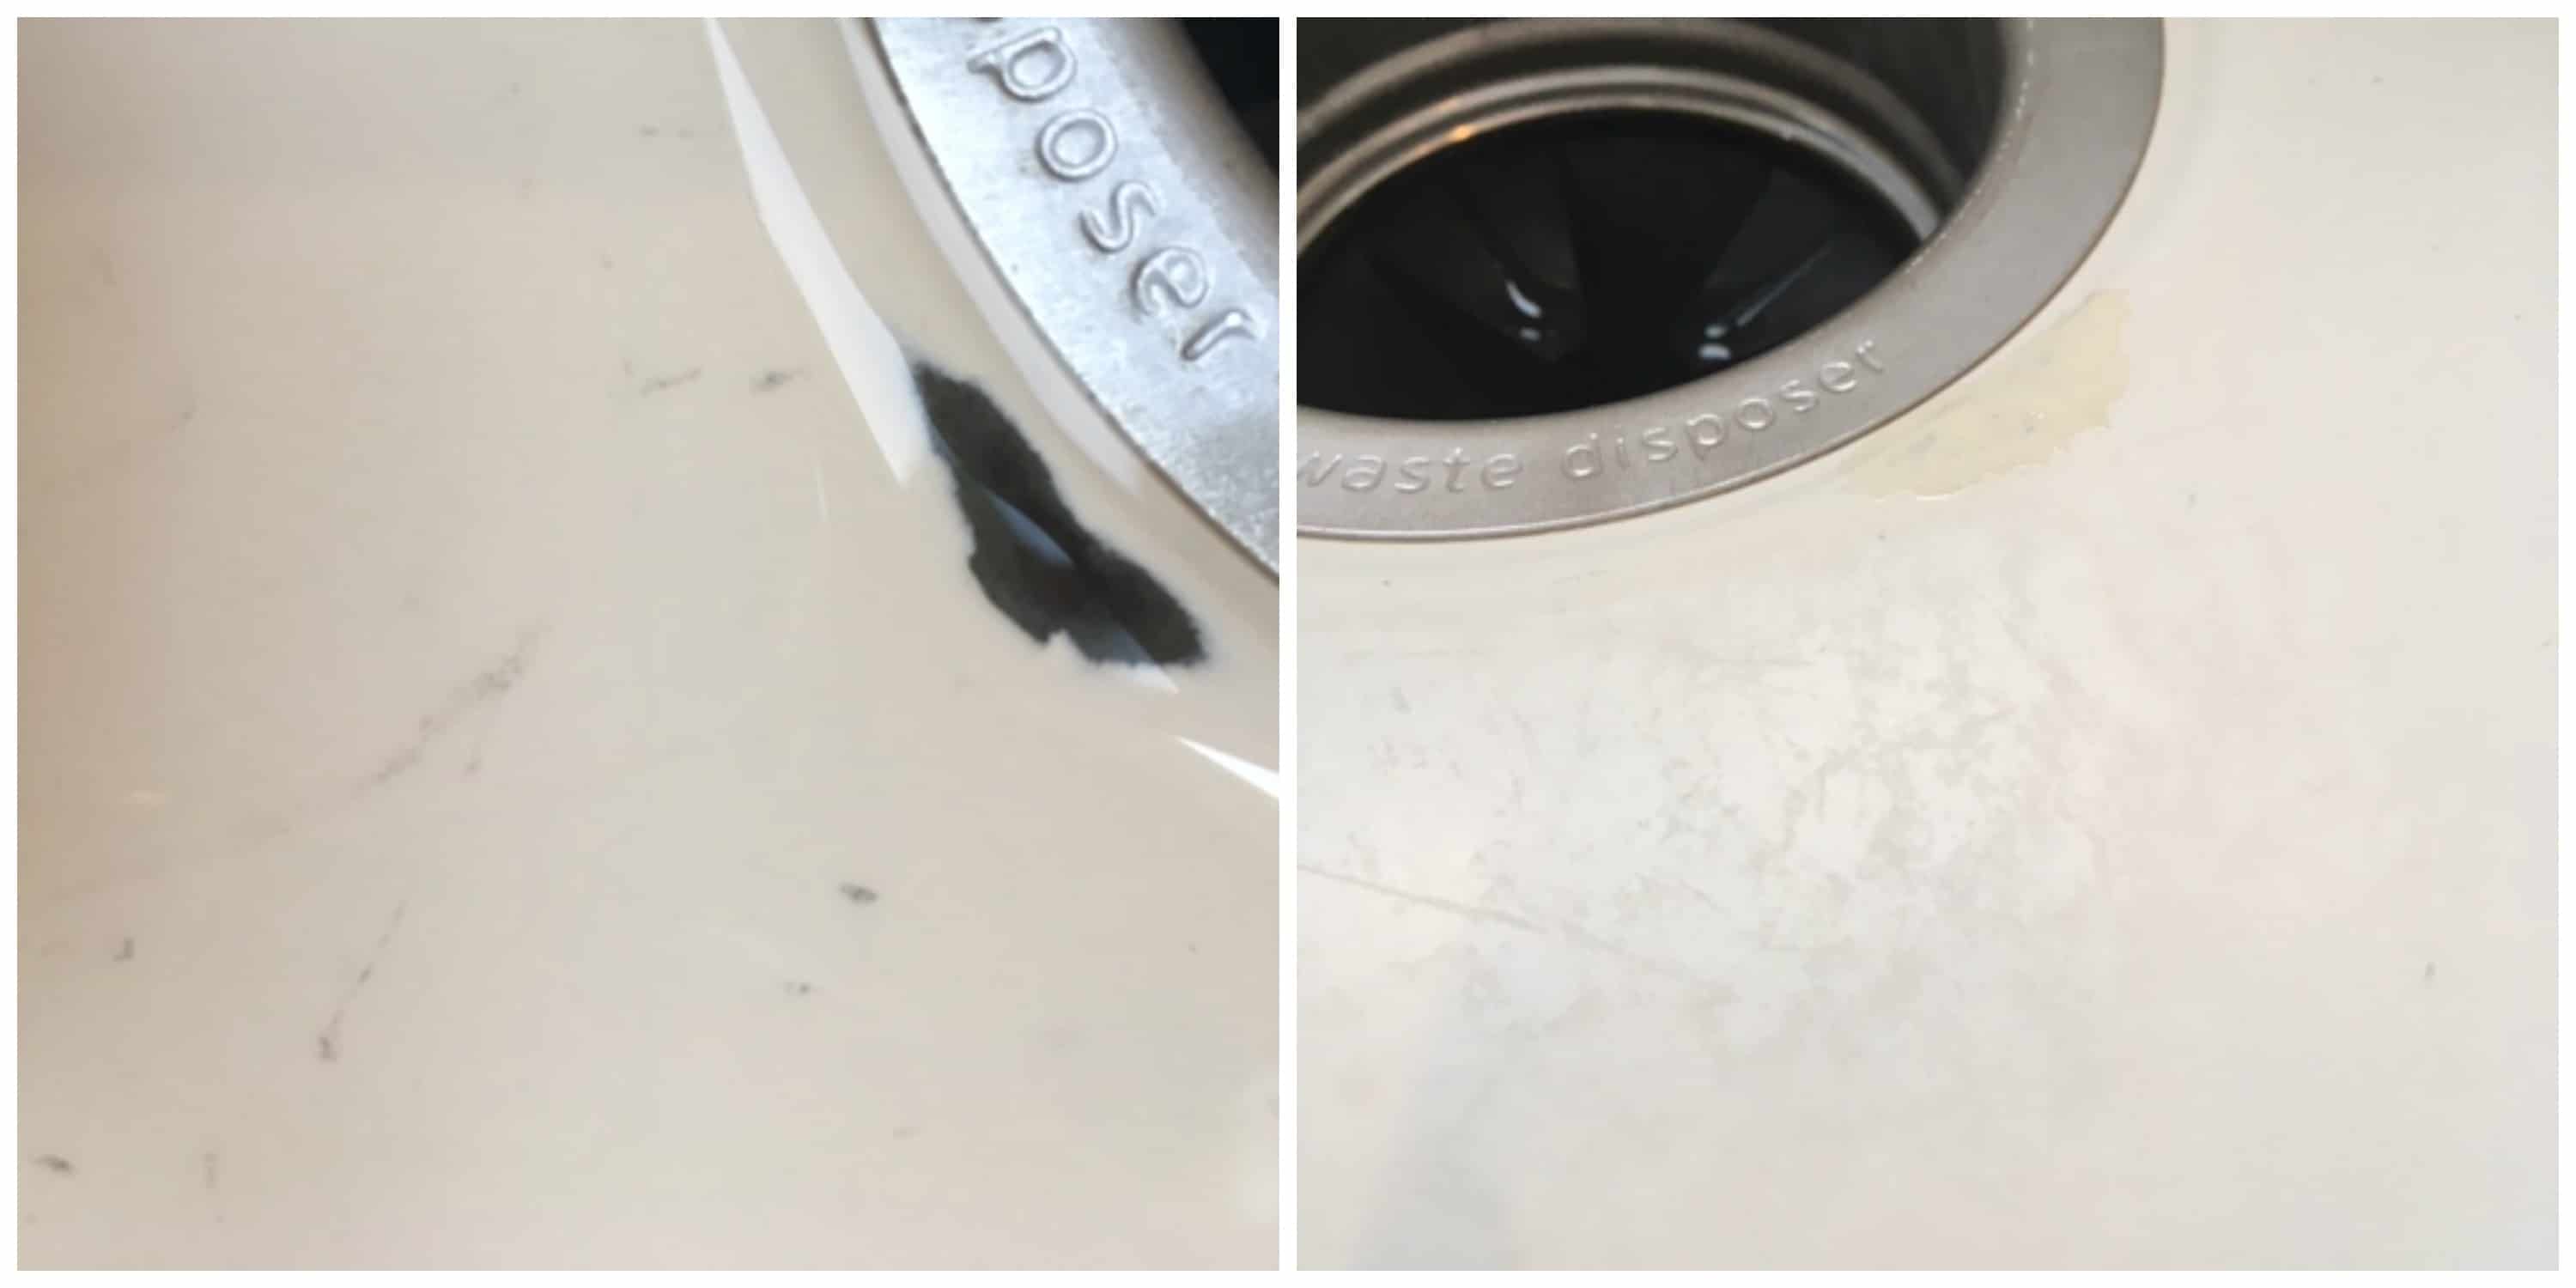
I loved how easy it was to use the repair kit to fix the porcelain sink. The hardest part was mixing the colors to match. Plus, my sink looks so much better without the big chip in it. If you are tired of dealing with a chip in your porcelain then you have to try this simple way to fix it.
Want Some More Cleaning Tips?
- How To Clean Fake Flowers
- The Easiest Way To Clean Your Food Processor
- How To Get Rid Of A Smelly Sink Drain
Susan Lawson says
I used this method to fix a spot in our toilet bowl. Worked great!
Radonna says
I am going to try this. I also assume one could use this on the dishwasher on the out side where my hubby has scratched it with his wheelchair.
thank you so much.
Julie says
Yes, it might work on the dishwasher too! Let me know what you think. I am so happy with how it looks on our sink.