


Inside: Is your dryer taking too long to dry? Check out how to clean your dryer vent. Save some time and money with dryer vent cleaning. See how to clean the dryer vent! These DIY dryer vent cleaning tips will have you cleaning like a pro!

I spent years not knowing that you needed to clean out your dry vent. I would clean the lint off the lint trap when I put clothes in the dryer, but that was as far as I ever got.
It never occurred to me that you would need to go any deeper into the dryer to clean it. After all, isn't that what the lint trap is for?
My dryer started having problems after a few years. Turns out, the dryer vent was clogged with so much lint.
Luckily, dryer duct cleaning is easy to do! Check out this simple and easy-to-do dryer vent cleaning hack.
Why This Works?
Over time, your dryer vent can get bogged down with lint that the lint trap doesn't catch.
You may notice that your clothes are getting slower and slower to dry. I would have to run the same load twice just to get it to dry.
Another thing that often happens is that the dryer will get extremely hot to the touch. I even burned one of my son's sweatshirts in the dryer.
This not only leads to clothes drying very slowly, but it can also cause a fire. Since I often start the dryer and leave the house, this scared me. I figured I needed a dryer vent cleaning right away.
How To Clean A Dryer Vent Like A Pro
If the idea of cleaning a dryer vent sounds overwhelming, don't worry! It's pretty easy to clean a dryer vent and get it unclogged.
If you haven't done it before, you will probably find all sorts of fun things when you clean your vent out.
To prevent fires and keep your dryer running smoothly, check out these easy tips on how to clean a dryer vent like a pro.
What You Will Need To Clean The Dryer Vent
To clean your dryer vent, you will need a few things. If you haven't done it before, you can pick up a DIY cleaning kit on Amazon. They are usually under $20.
Items Needed
- Vacuum (any kind will do)
- Dryer Vent Cleaner ( I have owned a few, but currently have this one)
- Microfiber Cloths
- All-Purpose Cleaner- The microfiber cloths and all-purpose cleaner are to clean the dryer afterward
I have found this kit is worth the money to clean your dryer vent. When you use it regularly, your clothes will dry faster. Plus, it will help your dryer last longer. It's a win-win!
Tip
You can use the dryer vent kit to clean your fridge coils too!
Free Weekly Cleaning Printable
Clean your home in under 30 minutes a day with this free Weekly Cleaning printable!
Step by Step DIY Dryer Vent Cleaning
Step 1: You will want to start by cleaning off the lint trap. Then vacuum around the lint trap and vent to get out what you can.
Step 2: After you have vacuumed the area around the lint trap, take the lint trap vent brush and insert the brush into the lint trap vent as far as you can.
Note
It is very flexible and takes a bit of maneuvering to make sure it goes in all of the way. Once you get it in, twist the handle of the brush while slowly removing it to trap the lint.
Step 3: Repeat if necessary.
Tip
If you have much lint on the brush I recommend repeating this step once more. You can see below I am not getting a lot off with the brush, but that is because so much lint was inside the vent.

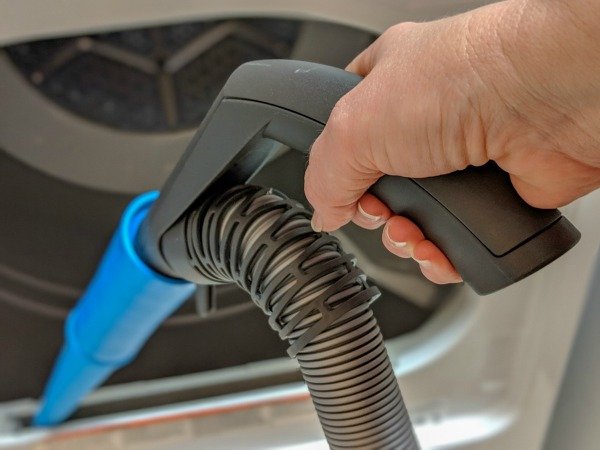
Step 4: Once you have removed some of the lint with the brush you can use the vacuum hose attachment to really get in there and clean. This is where the magic happens! 🙂
Note
I am always amazed at the amount of lint that the attachment removes. It is very slow going, you need lots of patience to use the attachment. Unfortunately, if you have as much lint as I usually do in my trap, you will need to repeat this step about 10-12 times.

Carefully feed the vacuum hose attachment into the trap. Attach to your vacuum and turn on the vacuum.
Most likely you will quickly hear it clog and need to remove it.
Remove it very carefully and pull the clog out and then repeat.
Step 5: Keep repeating the above step until all the lint is removed.
It takes a while, but you will be amazed by how much lint it removes. I sometimes spend 20-30 minutes doing this.
Check out all of the lint it removed below! It is crazy!! Make sure you clean your dryer lint catcher too!
You can see step by step instructions here on how to clean the dryer lint trap. You will actually want to scrub it not just remove the lint.

Cleaning Dryer Vent Pipe
Once you feel like the vent trap is clean you can move on to the dryer vent duct behind your dryer. Dryer duct cleaning is pretty easy and doesn't take a lot of time.
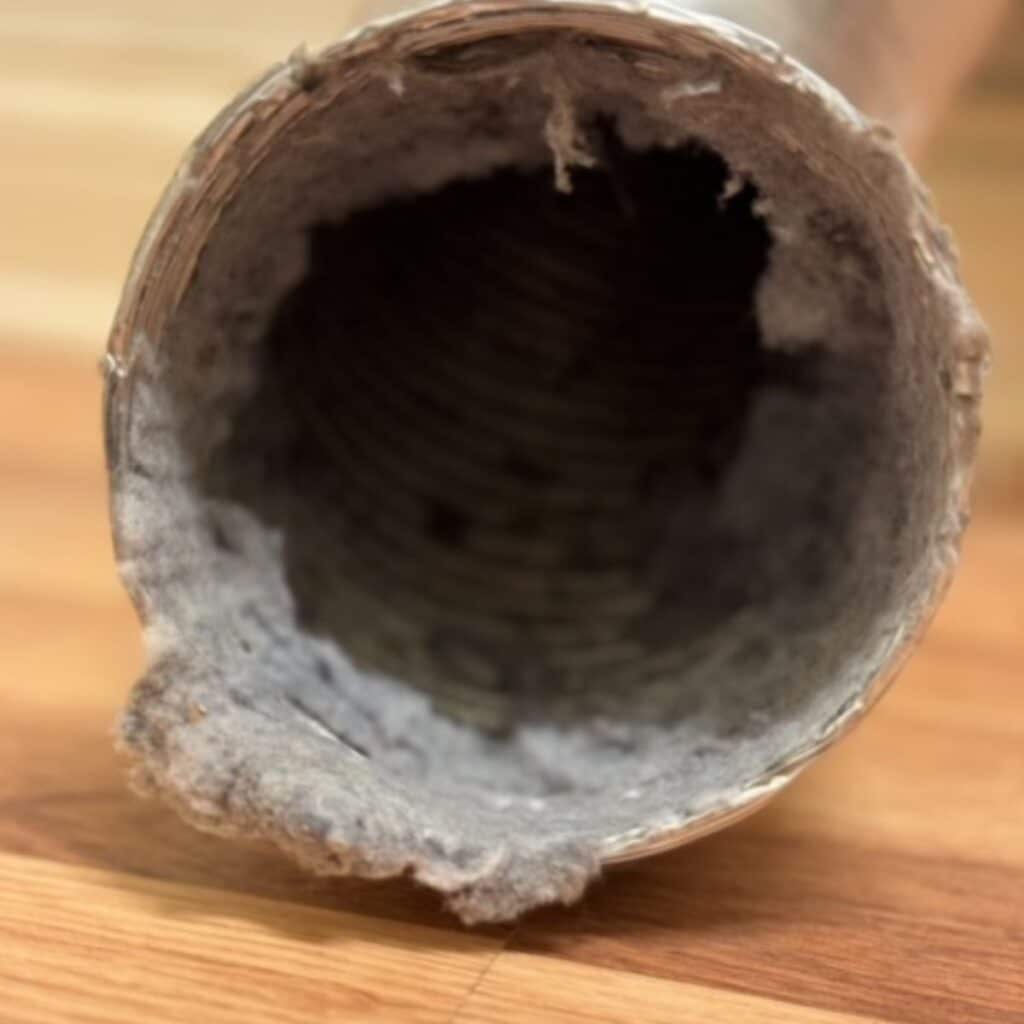
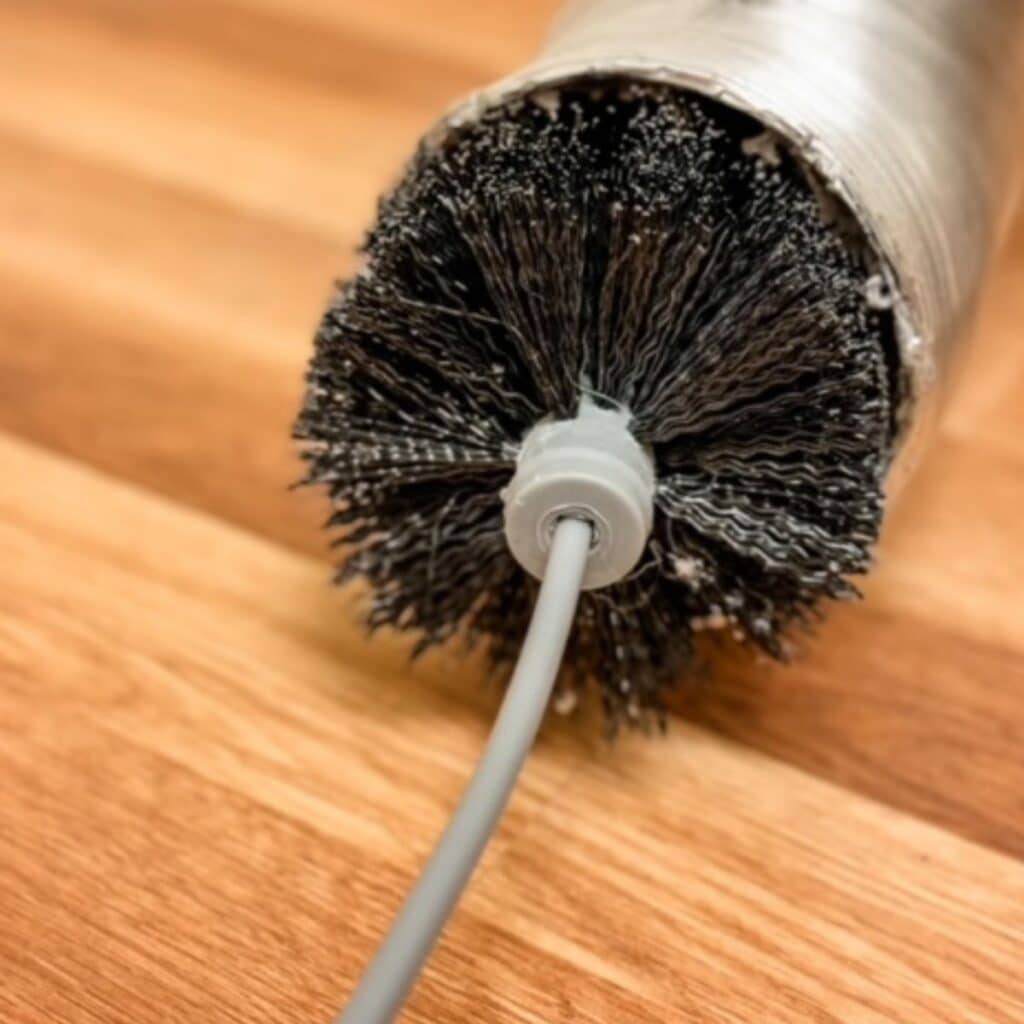
Use the large dryer vent duct brush to clean out the duct. Move it carefully spinning while you push it in.
Pull it out and remove the lint from the brush. If you find much lint on it repeat the step again. I never find too much lint in the duct. I think the majority of it was stuck in the dryer.
The first time I cleaned my dryer vent this way, I was amazed at the difference it made in drying time.
My drying time for most of my clothes was cut in half. This not only saves me time but also money. I don't have to spend as much on gas to dry my clothes.
By using the cleaning kit every 3-6 months I get a good amount of lint from it and don't have the same dryer problems that I did before.
Since I started doing this I have heard of too many house fires started by lint in the dryer vent.
This simple dryer vent cleaning hack is amazing!
Plus, it's so much cheaper than paying someone to clean my dryer vents. You don't need to be a big DIYer to do this DIY dryer vent cleaning.
Following these tips on how to clean your dryer vent like a pro will help save you money and time!

Common Questions
Yes, it is easy to clean a dryer vent at home with a kit. You can pick up a kit on Amazon for cheap and clean your dryer vent in under an hour.
After years I had to replace my first dryer vent kit and I now use the Lint Lizard Dryer Vent Kit. You can see which kit I use here.
Your dryer vent can accumulate lint and over time this will clog your dryer and slow your drying time. Cleaning your dryer vent every 6 months or so will help keep your clothes drying fast and prevent a dryer fire.
Yes, you should never run your dryer while you are sleeping or aren't at home. Dryers can easily cause house fires. By using a kit every 6 months to clean a dryer vent you can prevent a dryer fire and keep your dryer from overheating.
You can easily use a leaf blower to blow out the pipe from the dryer vent. Insert the leaf blower into the dryer vent duct leading to the outside and turn on the leaf blower. Allow it to blow for about 30 seconds. Turn it off and check outside to see if it has blow debris. You can continue to do this until it runs clean. It won't work as well as using the duct brush, but will work to keep it somewhat clean.
I recommend that you clean the dryer vent every 3-6 months. It is amazing how quickly you can start to accumulate debris in the dryer. Put this easy task on your quarterly list!
Sandra Frederiks says
Half a cup of white vinegar does an excellent job of softening clothes and it doesn't clog your dryer vent. It is also much cheaper and the wrinkles will fall out of your clothes if you hang them up while they are still slightly damp. You can prevent static cling by wadding up a piece of aluminum foil and putting it in your drr with the wet laundry. When it tumbles in the dryer, it forms a perfect sphere. It is also reuseable. Saves a bit of money and does 't add unnecessary perfumes into the air or water. Vinegar deodorizes the laundry and the washer, and helps prevent mold and/or mildew from forming on your clothes or in the washer. Wonderful stuff!
Sarah H. says
After reading this, I got curious & decided to see how much lint I had in my dryer. I took a regular baby bottle brush to it, and OMG so much lint came out! It's disturbing how much it can hold! I'm also hoping this will help cut down on electric - our dryer uses the most energy in the apartment.
Julie says
It's amazing how much lint gets caught up in there! Hopefully you save some money and it drys your clothes faster.
Nancy says
I can't even get behind my dryer. Not enough room to move it forward .
Vickie says
Where did you get the kit
Julie says
Hi Vickie,
I bought mine on Amazon. You can see it in the link below.
http://amzn.to/1rgZEHw
Briana says
Do any of you have a front loading washer? Anyone have tips on cleaning it? After a while it gets musty smelling my mother told me. I saw washer cleaning fluids at the grocery store, but seems there is more to it. Thanks y'all!
Julie says
I don't have any tips, sorry. I have heard they are very hard to keep clean.
Mike says
You need to dry inside the rubber gasket where the door opens.
Dry the inside of the washer door.
I also have a small door on the bottom, that holds a hose. Empty that hose every week. Once a month, run an empty load with a scoop of front loading washer cleaner.
Carrie says
Make sure to leave the door and soap drawer open after every load to allow the washer to air out. I use vinegar instead of fabric softener on some loads of clothes which also helps keep the washer clean. I have used my front load washer for over five years and have never had it smell musty or gross. The most important thing to remember is since the door is water tight if you close the door after a load of wash it will never dry out. If your washer smells now one of the washer cleaner packs would not be a bad idea.
Cinnamon says
I use white vinegar and run it empty. I don't know how much is needed so I use maybe a quart or 2 (probably overkill). Leaving it open helps too.
Cynthia says
With a front load washer do not close the door after you're done washing otherwise it's seals and that's what causes the musty smell I have dogs so I also have to remember to check under the door seal for extra clumps of dog hair
Geoff says
Leave the door cracked open when you aren't using it will allow the water that doesn't drain to evaporate and will allow everything to dry so it doesn't go mouldy or smelly. If it does smell you can buy pucks to run through and they clean it. I think "all fresh".
If you use a bleach solution and a clothe you can clean all the rubber and cracks in the washer. Then do a rinse cycle to remove any bleach residual.
Darlene says
Leaving the door to the washer open so the drum will dry out will help.
AL says
Take the vent pipe outside and turn the garden hose on and wash the pipe out.
Julie says
Great tip! Thanks
Drew says
This is a great weekend task!
Julie says
You're right Drew, it is a perfect weekend task
Bruce Ellis says
after cleaning out the lint trap , I disconnect the vent line, move the dryer over then take my leaf blower and run it in the outside vent and turn it on. You'll be surprised how much accumulation of lint you'll have.
Julie says
Great idea! I will have to try that next time. Thanks!
SSH says
Why not just buy a new dryer vent hose?
Julie says
So much of lint gets trapped in the dryer too. You could choose to clean the dryer and buy a new dryer vent hose, but I prefer to clean it all out and save myself the money of buying a new dryer vent hose.
Fiona Fowlks says
One thing to remember is that "lint" is actually fibers coming off your clothing, sheets, towels and blankets. What this means, is that the process of drying actually shortens the useful life of clothing.
As much as I can, I hang laundry to dry either outdoors or in my basement first. Then, I toss them in the dryer for a short, 5 or 10 minutes on low to soften and reduce wrinkles. This works especially well with jeans, which normally take a long time in the dryer.
By doing this method, you save money several ways, the cost of gas and electricity using your dryer 100% of the time, and also the cost of replacing your clothing and linens so often.
In the winter time, an added bonus is, hanging damp laundry in the house can add some much needed humidity to the air that tends to become uncomfortably dry from central heating!
Julie says
I love the idea of putting them in the dryer after line drying them! Jeans can be so stiff after line drying. Thanks for the tip!
Tim says
My wife sent me this pin regarding cleaning our dryer trap. I had to chuckle because this is something I regularly do and she had no idea! Lol. Being a good sport, I read the pin anyways and would like to recommend one other area to clean that is often overlooked. The duct eventually vents to the outside of your home, either through a side wall or the roof. Be aware that this too can get clogged and can cause problems later on. Ours is on the roof, so once a year I have to climb a ladder and reach my hand (or more appropriately fingers) into a somewhat sharp metal vent. I will say if it is on the roof to be extra careful when heading to clean it out (or you can always send your husband, brother, dad if roof climbing isn't your thing. Lol). Most of the lint will accumulate at the lowest point (nearest to your dryer) but ensuring everything is clean is the best way to prevent fires. Cheers!
Julie says
Great tip! Yes, we have a vent that is on the side of our house, thank goodness. We do get a decent amount of lint in the outside vent. Thanks for the reminder!